Introduction
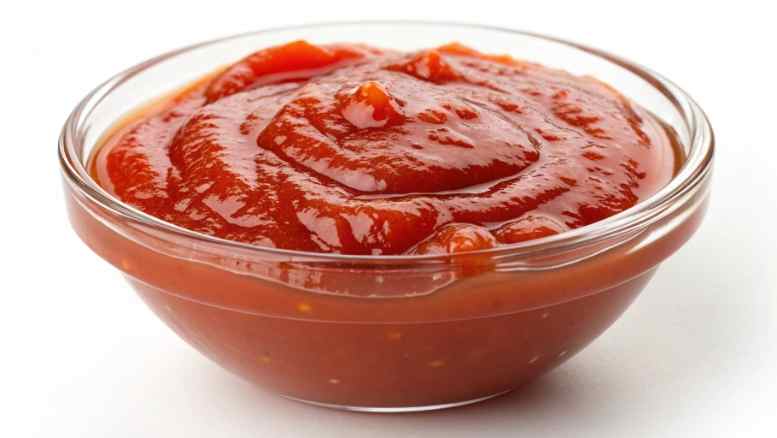
This is the iconic neon-red sweet and sour sauce you crave from Chinese takeout—but homemade, balanced, and ready in 10 minutes. Perfectly glossy, sweet-tangy, and clings to everything: chicken, shrimp, meatballs, or just a spoon at midnight. Presented in a small white ceramic bowl with a spoon dripping sauce, this Sweet and Sour Sauce offers that signature restaurant shine everyone recognizes instantly.
Ingredients
For the Sweet and Sour Sauce (makes ~1½ cups): • ¾ cup granulated sugar
• ½ cup rice vinegar (or apple cider vinegar)
• ⅓ cup ketchup
• ¼ cup water
• 2 tbsp soy sauce (low-sodium preferred)
• 1 tbsp cornstarch + 2 tbsp cold water (slurry)
• Optional: ¼ cup pineapple juice (replace part of water for fruitier version)
• Optional: a few drops of red food coloring (for a classic takeout look)
For Serving: • Fried chicken, shrimp, pork, or meatballs + sesame seeds and green onions
Step-by-Step Process
- Combine base ingredients
In a medium saucepan, whisk sugar, vinegar, ketchup, water, soy sauce, and pineapple juice (if using) until smooth. - Bring to a simmer
Place over medium heat. Stir occasionally until the sugar dissolves and the mixture just starts to bubble. - Thicken with a slurry
Stir the cornstarch + cold water slurry again (it settles), then pour it into the simmering sauce while stirring constantly. - Cook until glossy
Continue cooking 1–2 minutes until the sauce thickens and turns glossy and translucent. It should coat the back of a spoon. - Adjust
Taste—add a splash more vinegar if you want it tangier, or 1 tsp sugar if sweeter. Add food coloring now if desired. - Cool slightly
Sauce thickens more as it cools. It’s ready when it’s thick enough to cling but still pourable. - Serve or store
Toss with freshly fried protein while both are hot for maximum cling, or serve on the side.
Tips for Perfect Sweet and Sour Sauce
• Cornstarch slurry must be stirred right before adding—prevents lumps
• Use rice vinegar for authentic flavor—white vinegar is too harsh
• Make a double batch—it keeps forever and reheats perfectly
• Add slurry off heat if nervous—whisk in, then return to heat
• Pineapple juice version = Hawaiian sweet and sour (restaurant secret)
• Reheat gently on low with a splash of water—returns to perfect gloss
Variations and Customization
• Pineapple Sweet & Sour: replace water with pineapple juice + add tidbits
• Spicy Kick: add 1 tsp chili garlic sauce or sriracha
• Hong Kong Style: add 1 tbsp hoisin + ½ tsp five-spice
• Healthier Light: cut sugar to ½ cup + add extra vinegar
• Orange Chicken Style: add zest + ¼ cup orange juice
• Luxe Duck Sauce: blend in 2 tbsp apricot jam
Storage and Serving Tips
• Keeps 1 month in fridge in an airtight jar—flavor gets better after a week
• Freezes up to 6 months (perfect in ice-cube trays for quick use)
• Reheat gently on the stove or 20-sec microwave bursts with a splash of water
• Quick refresh: whisk vigorously while heating
• Store in a squeeze bottle for easy drizzling
• Perfect over rice, egg rolls, or as a dipping sauce
Nutritional Information
Based on 12 servings (2 tbsp each):
- Calories: 70 kcal
- Total Fat: 0g
- Carbohydrates: 18g (Sugars 16g)
- Sodium: 180mg
Conclusion
This sweet and sour sauce is pure Chinese-takeout nostalgia—glossy, clingy, and so much better than the packet stuff. Ten minutes on the stove and suddenly you’re the family chef who “makes it just like the restaurant.” Keep a jar in the fridge, and Friday night dinner (or midnight snack) is forever upgraded.
Sweet and Sour Sauce Recipe: Glossy & Tangy
Ingredients
- ¾ cup sugar
- ½ cup rice vinegar
- ⅓ cup ketchup
- ¼ cup water
- 2 tbsp soy sauce
- 1 tbsp cornstarch + 2 tbsp water
Instructions
- Whisk everything except the slurry in a saucepan.
- Bring to a simmer.
- Stir in cornstarch slurry.
- Cook 1–2 min until thick and glossy.
- Cool slightly; use or store.
Notes
• Add pineapple juice for Hawaiian style
• Freezes perfectly
• Try spicy or orange variation